Pied Beauty

Gerard Manley Hopkins (1844-1889)

Glory be to God for dappled things—
For skies of couple-colour as a brinded cow;
For rose-moles all in stipple upon trout that swim;
Fresh-firecoal chestnut-falls; finches' wings;
Landscape plotted and pieced—fold, fallow, and plough;
And all trades, their gear and tackle and trim.

All things counter, original, spare, strange;
Whatever is fickle, freckled (who knows how?)
With swift, slow; sweet, sour; adazzle, dim;
He fathers-forth whose beauty is past change:

Praise him.

Wednesday, September 15, 2010

Bloom Day, September 15

Happy Garden Bloggers' Bloom Day, and thanks to Carol at May Dreams Gardens for hosting.  Today, gardeners all over talk about flowers blooming at home.  Hop on over there later and check out her lovely garden, and the links to gardens everywhere.

It's so hot around here I can barely stand to go out and take a picture.  Temperature-wise, it's no hotter than most of August, and maybe even a tiny bit cooler, but by September 15, I am so tired of heat and humidity.  I can hardly wait for the cooler days and cooler colors of fall.  But the flowers blooming now are the toughest of the tough, and I'm happy to share them with you.

Bougainvillea.  Faithful as always.

Coral Vine.  Not as good as last year, but still.

Mauve Dancing Ladies Ginger.


Butterfly Ginger -- a great year!
Lantana.  Cannot be killed. (Look! No lacebugs!)
Milkweed.  Caterpillar damage artfully cropped out.

Oxalis.  In the full sun.  On the west side.
Passionflowers for the fritillaries.
Pretty pavonia.  Not the Peruvian kind!
Pentas.  My almost-perennial standby.
Turnera.  My favorite in the morning.
And I'd be remiss if I didn't show you the most prolific blooming groundcover in my entire garden.  Yes, there it is.  The lovely Virginia Buttonweed.  Sigh!

Virginia Buttonweed.  Also cannot be killed!

Happy Garden Bloggers' Bloom Day and don't forget to visit Carol's site for more flowers.

Tuesday, September 14, 2010

Coastal Prairie Quilt Guild of Texas

Detail of the Donation Quilt, made by Guild members
 Last weekend, I attended the Coastal Prairie Quilt Guild of Texas' first quilt show, called "Binding Borders Around The World."  It was a wonderful show, and especially impressive considering that it was the first show of a fairly new guild.  This group was formed in 2008 and already boasts almost 200 members.

Prize-winning quilt made by my mother-in-law!

I love quilt shows (and quilting!) in no small measure because I think this sort of artwork has the power to confound our expectations about what people are capable of.  Lots of us have preconceived notions about sewing in general and quilting in particular.  You know, little old ladies, quaint country charm, lots of gingham.  You can almost smell the homemade cookies, can't you?

Closeup of machine quilting.  Hard to photograph.

Attending a quilt show, especially a large one, can be an eye-opening experience.  Not only is the quality of the craft outstanding (and getting better all the time), but the visual power of the quilts is arresting.  Some quilts are country-quaint, true.  But not all.  And quilts that draw on our shared traditions often rely on a very sophisticated sense of color.  The quilt below is a good example:  it echoes the Civil War colors and prints, but in a very modern colorway and composition.

Opportunity, by Jackie Hillman

For me, sewing and quilting, and supporting quilt shows, are a bit about reclaiming a place at the artists' table.  While there are some wonderful male quilters, it is by far a female craft.  And I think it's important to acknowledge that the work these women do, with "homely" materials like fabrics, needles and thread, is art as well as craft.  If you are in the slightest doubt, check out the International Quilt Festival, held every year in Houston.  This year, it's November 4th through 7th at the George R. Brown Convention Center.

See Some Secret Sunflowers, by Mary Jo Yackley

Besides all that, I think women who can make great art and bake homemade cookies are cool!

Judy's Geishas, by Carolyn Hughes
Closeup of the hexagon borders on Judy's Geishas

Monday, September 13, 2010

Endless Clay

Recently I had cause to dig a 2 foot wide shallow trench for what seemed like miles and miles.  It reminded me how much I hate to dig in sticky, wet clay.  I used to think that perhaps there was a chance I could dig up all the clay.  Perhaps even pay someone to carry it away.  That was before I learned the awful truth.

Click here to download a larger, 2 pg. version.

The clay goes on forever.  My house sits on a soil profile known as Brazoria Clay, area 53 on the map above.  Geologically, it's a floodplain of the Brazos River and its parent material is the clayey alluvium of the Holocene Age.  The clay here is more than 80 inches deep.  Ponder that a moment.  Clay, more than 80 inches down.  And it's been here for more than 12,000 years.  Sigh.

On the one hand, clay usually has a higher organic content than, say, sand.  Generally speaking, the Brazoria Clay soil profile is about 4% organic matter at the surface.  It drops substantially the deeper you dig.  I can see this when I dig a trench:  the surface layer is black or very dark brown, an indication of rotted organic matter.  But just below the surface is that deep blue-gray river of clay.  That's the other hand, the sticky, heavy clay that lurks just beneath the arable soil.

If you remember your soil science, clay particles are the smallest of the soil mineral components (sand is the largest).  Because the particles are so small, they can pack together very tightly.   People sometimes advise gardeners to mix in sand to break up the clay and improve soil texture.  But clay and sand particles are so different in size that they don't mix well.  In fact, around here, what you get when you mix sand and clay, then add water and vegetable matter, is adobe.  Better idea:  add organic matter.  In warm climates like mine, organic matter decomposes rapidly and is depleted.  It's a good idea to try to incorporate organic matter at least once a year to maintain soil tilth and fertility.

In case you're wondering, I'm writing about clay because I'm too tired to dig any more of it up.  If you're interested, a wonderfully geeky place to poke around is the USDA Natural Resources Conservation Service's Web Soil Survey.  You can zoom in on your own soil profile, right down to the address level!  It doesn't hurt as much as actual digging does.

Saturday, September 11, 2010

Off Topic: Coffee Roasting

Photo: Jeff Kubina.  Licensed under the Creative Commons Attribution-Share Alike 2.0 Generic license.
 Thursday I had the distinct pleasure of meeting Will Benitez of Katz Coffee, a local coffee importer, roaster and wholesale purveyor.  I only wish I had good pictures of my own.

Illustration public domain.

Will showed me the roasting and production area and explained how coffee is selected, graded, imported and roasted.  I had never seen green coffee beans before, and I didn't know that the darker the roast, the less caffeine remains in most beans.  As a gardener, I have seen coffee plants (very handsome) and other tropicals in the coffee family, but only as ornamentals.  It's too cold here to grow coffee successfully -- did you know that all coffee is grown within 1000 miles of the equator?


We then visited the cupping room and tasted a wonderful Guatemalan-Sumatran blend.  I'm partial to Sumatran coffee anyway (at least, when I'm flush), but this blend seemed brighter and fruitier.  See how sophisticated I sound already?  Will demonstrated Le Nez du Café by Jean Lenoir, a professional coffee tasting training tool.  There are 36 little bottles of concentrated aromas that comprise the essence of coffee.  I tested myself on #17:  I guessed "almond" but it was "apple."  It's harder than it sounds!

Photo: Wolfie, licensed  under the Creative Commons Attribution-Share Alike 2.5 Generic license.

Katz is the roaster behind great coffee-house beverages at places like Onion Creek Café, Benjy's and t'afia.  As someone who grew up against the scented backdrop of Maxwell House, roasting over on the East Side, I love that there is a local, independent alternative.  Kudos to Katz!

Friday, September 10, 2010

Foliage Friday: Sweet Gum Tree

Palmate leaves of the Sweet Gum tree
Is this tree disappearing?  I hope not.  It seems like they were everywhere when I was a kid.  I can't recall seeing one planted in someone's yard, not for the longest time.

The drawback:  immature fruit is already spiky!
The Sweet Gum Tree is native to the warmer sections of the United States and is one of our most common hardwood trees.  North of here, it's beloved for its vivid fall color, and noted for its spiny fruit.  You don't ever want to step on a dried sweet gum ball barefooted!  Yes, it's true that the fruits can litter your yard in the fall, and the limbs sometimes break in high wind, but it's a fast-growing shade tree with a pretty, distinctive leaf.  The five-fingered foliage is much more "pronounced" than that of the maple tree, if you know what I mean.

Bark -- see the tiny holes?

Birds of all kinds like the seeds contained in the mace-shaped fruit, but one bird goes out of his way to drink the golden sap:  the yellow-bellied sapsucker.  He drills neat rows of little holes and returns time and again to the same tree for nourishment.  Other creatures, once the hard work of drilling is done, are also attracted to the sap.  You may see butterflies, honeybees and hummingbirds drinking the sap of the sweet gum tree.  Of course, the sapsuckers will actively defend their dinner table!

Yellow-bellied Sapsucker.  Photo: Patrick Coin

I thought this was interesting:  the Sweet Gum tree was one of the first trees introduced to England from the New World.  Missionary and plant collector John Bannister brought it to England in 1681, where it was greatly admired for its fall color.  Before New World trees arrived, fall color was scarce indeed.

Thursday, September 9, 2010

A Great Summer For Compost

It's a reach, I know.  But this was the only good thing about Houston summer weather that I could wholeheartedly affirm.

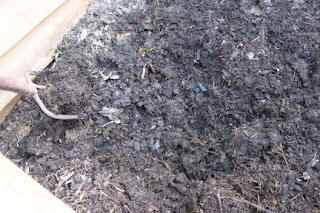
Looks pretty good, right?
It's been a wonderful summer for making compost.  The perfect conditions were present:  lots of hot, sunny weather, followed by lots of rain.  Down here in Fort Bend County, the rain came at the correct intervals and I never had to actually go out and water my compost.  I always feel silly doing that. 

I am a lazy cold composter, so I don't get very scientific about it.  Sometimes, if I'm feeling particularly energetic in the fall, I take the family on evening jaunts to gather leaves.  The Chief Engineer drives the van, my daughter keeps her head low so no one from school will recognize her, and I hop out and grab bags of leaves on the night before garbage day.  I like the clear plastic bags the best: that way I know exactly what I'm getting.  The idea is to alternate the dry brown leaves (carbon) with the lawn clippings (green).  I figure we cut the grass from about late February through October, so I try to get about 40 big bags.  Of course, then I have to stack them all behind the garage (but not against the garage!), which causes its own difficulties.

No leaves this summer.

My compost bin is built from a wonderful bracket set that I got from the Lee Valley catalog.  It can accommodate sides up to four feet long, but I will tell you -- that's too big.  I made some mistakes when I built mine, so you don't have to!  First, don't place it right up against the fence, especially not in a corner.  It's good to be able to get at it from all four sides.  Second, don't plan on making your bin 4 feet by 4 feet.  It's difficult to manage and difficult to fill entirely.  Make it 3 feet by 3 feet.  Third, don't cut your boards to fit exactly.  Make them as long as they can be without knocking into the boards on the adjoining sides.  When the bin is full, the compost presses outward, and boards cut too close will fall out of the slots.

My routine is simple:  I fill a metal bin in the kitchen with food wastes (plant material only).  When it's full, I dig a hole in the compost outside, stirring the big pile as best I can.  I bury the fresh trimmings.  In the summer, by the time the kitchen bin is full, the previous batch is already pretty far advanced.  I try to bury each batch in a different spot in the big pile. When I have leaves, I spread them in a layer just before I add that week's grass clippings. Because I am cold-composting, I don't put weeds in my bin, or any sort of animal products or oils.  We do get some critters in there, most notably the green fruit beetle, whose grub is big enough to have a license plate on it.  The wren family teaches insect retrieval classes out there too, but they are too cagey for me to photograph well.

Green Fruit Beetle.  Photo: Ron Hemberger

I usually stop adding vegetable wastes to the pile when the weather turns cool.  The compost sits quietly throughout our short winter and is ready for me to use each spring.  And no, I don't sift it.  It goes back to the garden as is.